Email Campaigns
Send bulk emails to groups of your contacts directly from PracticalCRM.
Accessing Campaigns
Click "Campaigns" () in the main navigation bar.
This page lists all the email campaigns you have created, showing their name, status, and basic statistics (recipient counts, progress).
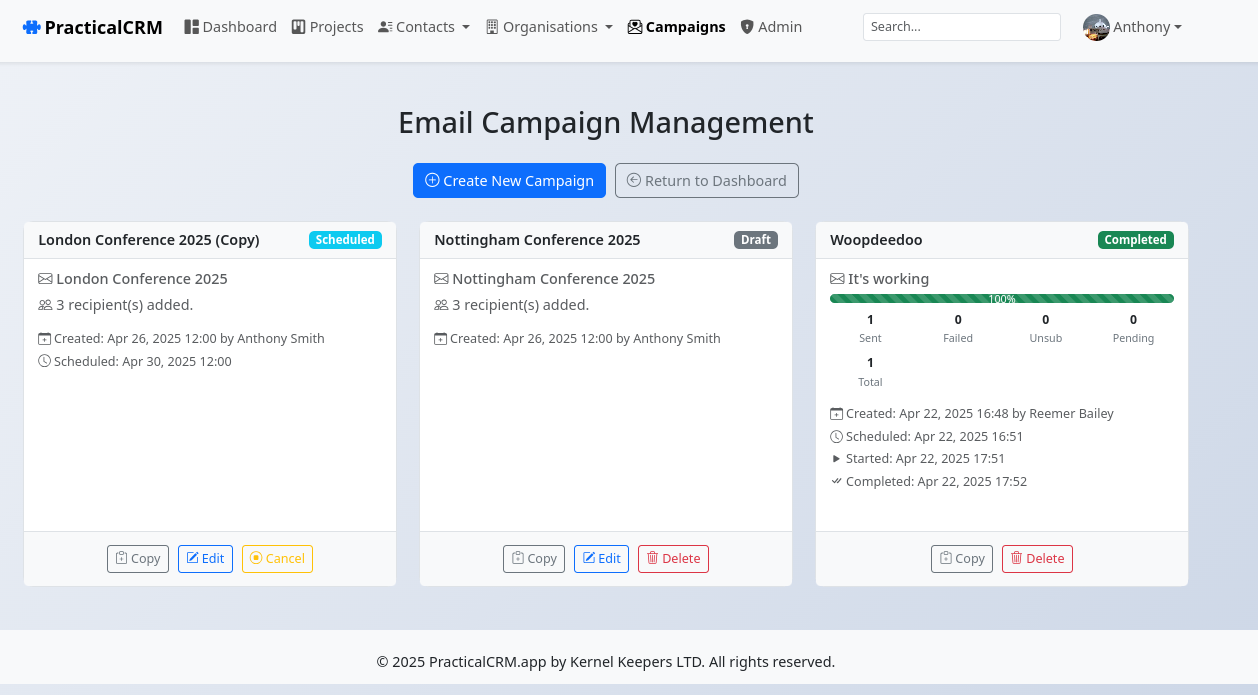
From here you can:
- Create a new campaign.
- View the status and basic stats of existing campaigns.
- Copy an existing campaign to reuse its content or settings.
- Edit campaigns that are in 'Draft' or 'Scheduled' status.
- Cancel campaigns that are 'Scheduled' or currently 'Sending'.
- Delete campaigns that are finished ('Completed', 'Cancelled', 'Failed') or still in 'Draft'.
Creating or Copying a Campaign
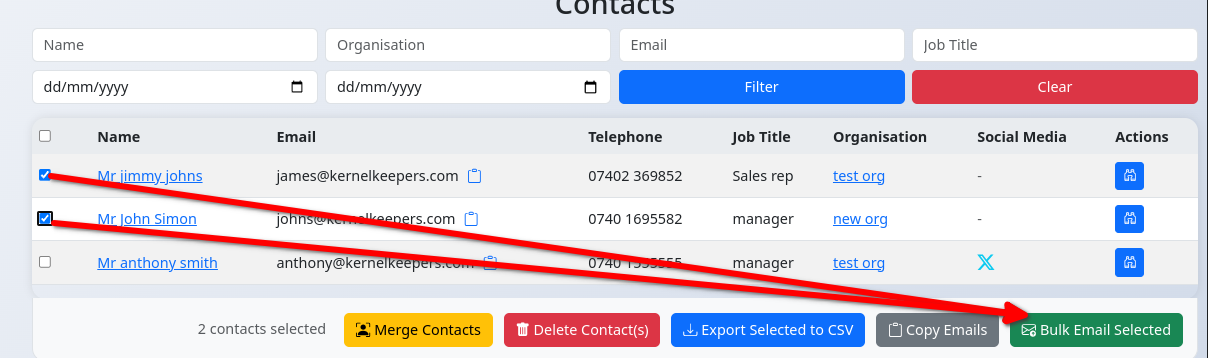
- From Scratch: Click the "Create New Campaign" button on the main Campaigns page. You will need to select recipients first (typically done by checking boxes on the Contacts page and clicking "Bulk Email Selected").
- From Contacts Page: Select contacts using the checkboxes on the main Contacts list page, then click the "Bulk Email Selected" button in the action bar. This takes you to the campaign creation page with those contacts pre-selected as recipients.
- Copying: On the main Campaigns page, click the "Copy" () button on an existing campaign card. This takes you to the creation page with the previous campaign's content, settings (like template), and recipient list pre-filled. The name will have "(Copy)" appended.
Composing Your Campaign
The campaign creation/edit form has several sections:
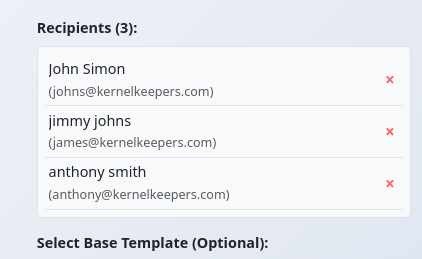
- Recipients: This list shows the contacts initially selected. You can remove individual recipients by clicking the (x) button next to their name. The count updates automatically.
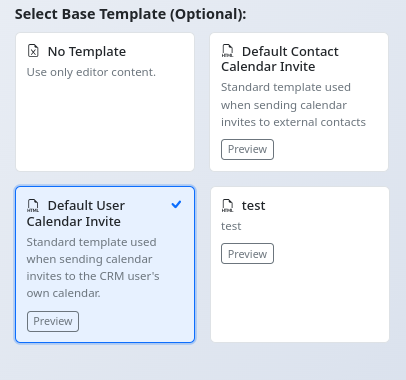
- Select Base Template: Optionally, choose a pre-defined HTML email template (managed in the Admin section) to wrap around your main content. Click a template card to select it (highlighted blue). Click "No Template" to use only the content from the editor below. You can preview base templates using the "Preview" button on each card.
- Campaign Name: An internal name for your reference (e.g., "Q3 Newsletter"). Required.
- Send From Email: Defaults to the system email setting, but you can override it here if needed (e.g., sending from `[email protected]` instead of the default). Required.
- Subject: The subject line of the email your recipients will see. Required.
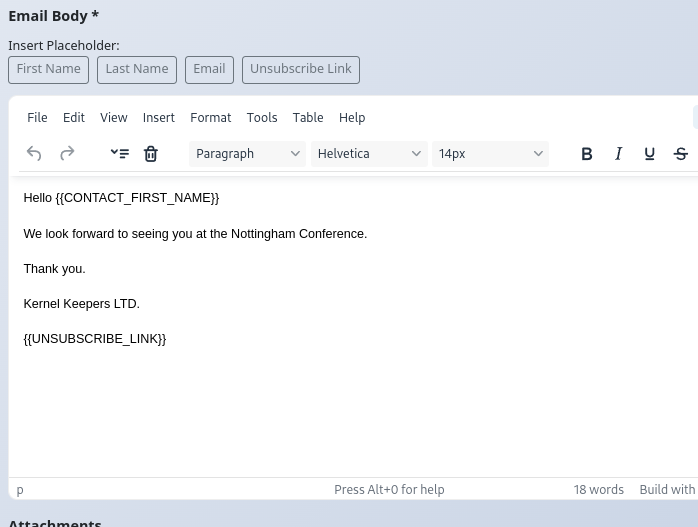
- Email Body: Use the rich text editor (TinyMCE) to compose the main content of your email.
- Placeholders: Use the buttons provided (e.g., `First Name`) to insert placeholders like `{{CONTACT_FIRST_NAME}}`. These will be automatically replaced with the recipient's specific data when the email is sent. The `{{UNSUBSCRIBE_LINK}}` is essential for compliance.
- Attachments: Attach files (PDFs, images, documents) to be sent with the email to all recipients. Be mindful of the total size limit (typically 10MB).
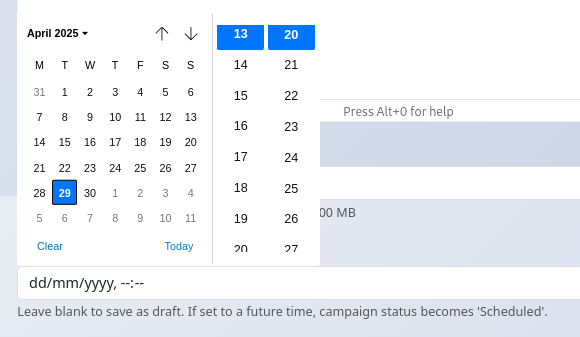
- Schedule Sending: Leave blank to save the campaign as a 'Draft'. Select a future date and time to schedule the campaign. The system will automatically start sending it at or shortly after the scheduled time (requires the cron job `cron/send_campaign_batch.php` to be running regularly on the server).
Saving and Sending
- Save Draft: Saves the campaign with a 'Draft' status. No emails are sent. You can edit it later.
- Submit for Approval / Save / Schedule: The main save button's text changes depending on context.
- If you set a future schedule date, it saves and sets the status to 'Scheduled'.
- If you don't set a schedule date, it saves as a 'Draft'.
- If editing an existing campaign, it updates the campaign (only possible for 'Draft' or 'Scheduled' statuses).
- Sending Process: Scheduled campaigns will automatically change to 'Sending' status when the cron job picks them up after their scheduled time. Emails are sent in batches to avoid server overload and potential spam flags.
Managing Existing Campaigns
On the main Campaigns list page:
- View Stats: For campaigns that are sending or completed, you can see the counts of Sent, Failed, Unsubscribed, Pending, and Total recipients.
- Edit: You can only edit campaigns that are in 'Draft' or 'Scheduled' status. Click the "Edit" () button.
- Cancel: If a campaign is 'Scheduled' or 'Sending', you can click "Cancel" () to stop it. Sending will halt, and the status will change to 'Cancelled'.
- Delete: You can delete campaigns that are 'Draft', 'Cancelled', 'Completed', or 'Failed'. Click "Delete" () and confirm. This permanently removes the campaign and its recipient data.
- Copy: Click "Copy" () to create a new campaign based on an existing one.