Contact Management
Keep track of the people you interact with – clients, leads, suppliers, and more.
Viewing Your Contacts
Access your contact list by clicking "Contacts" in the main navigation.
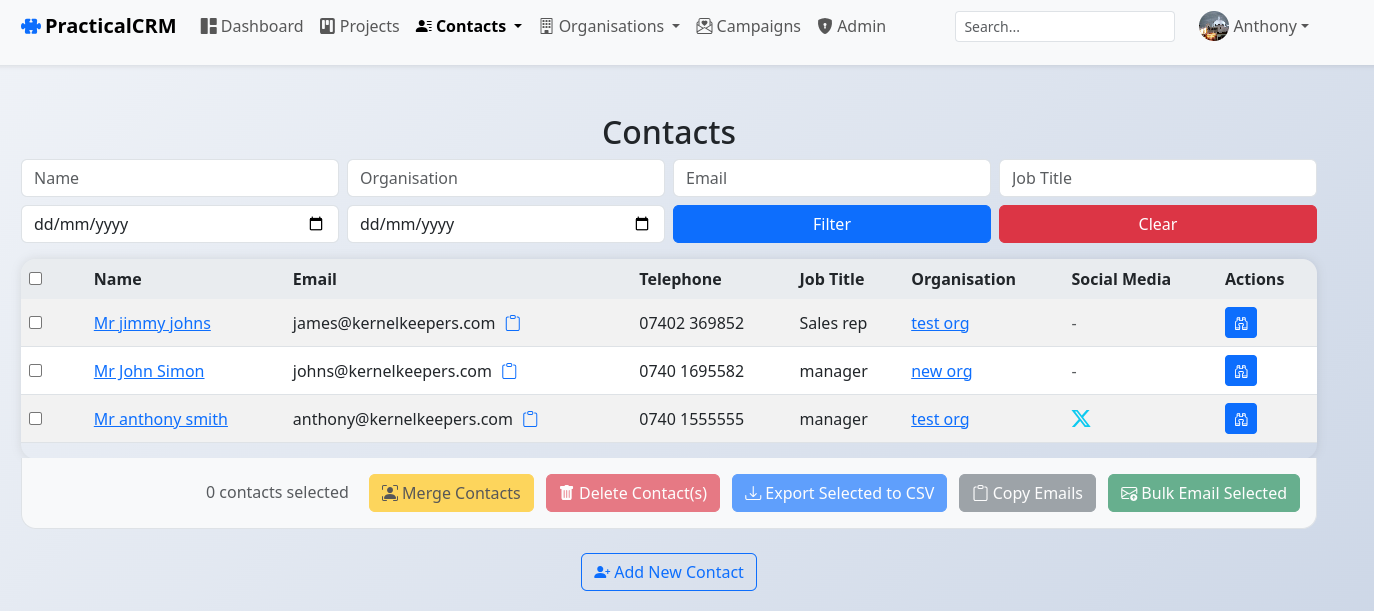
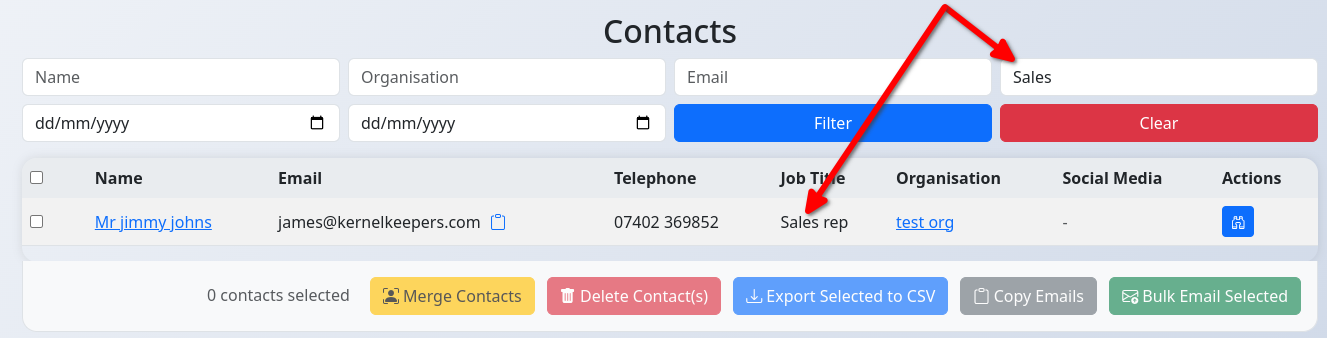
- Filtering: Use the filter fields at the top (Name, Organisation, Email, Job Title, Date Added) and click "Filter" to narrow down your list. Click "Clear" to reset filters.
- Pagination: If you have many contacts, use the page numbers at the bottom to navigate through the list.
- Information: The table shows key details like Name, Email, Phone, Job Title, and associated Organisation.
- Actions: Click the "View" () button to see the detailed view for a specific contact.
Adding a New Contact
- From the main Contacts list, click the "Add New Contact" button.
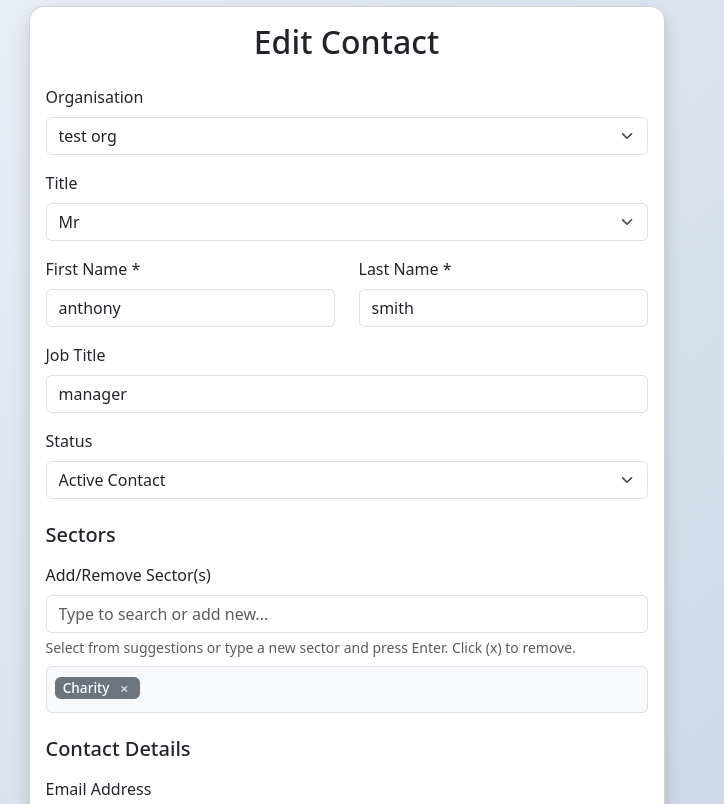
- Fill in the contact's details in the form.
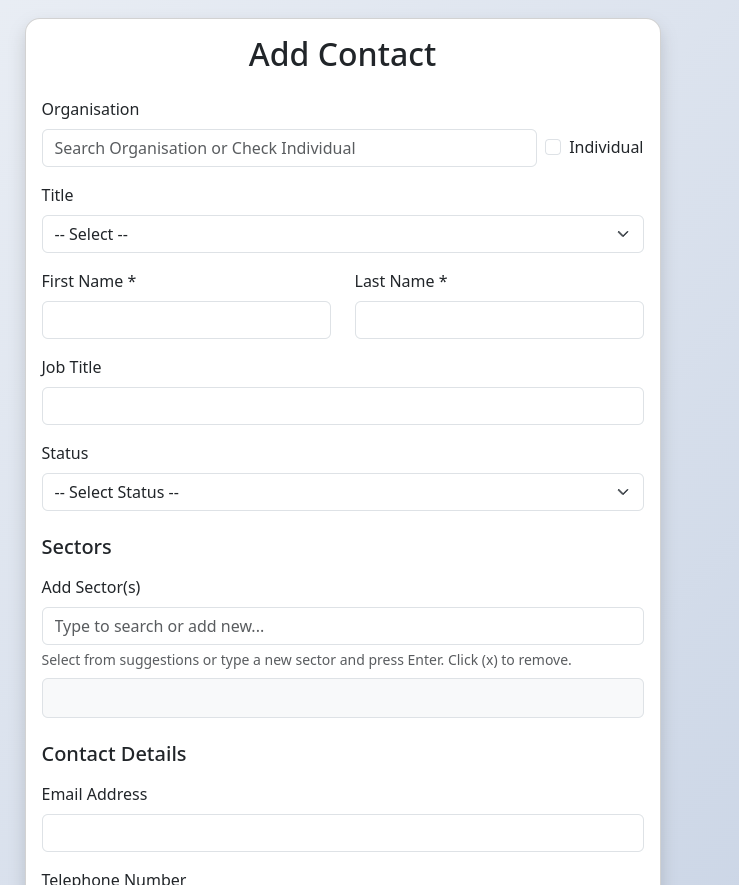
- Organisation: Start typing an existing organisation name to link the contact, or check the "Individual" box if they aren't associated with one.
- Name: First Name and Last Name are required.
- Status: Choose Lead, Active Contact, or Dormant to categorize the contact's current stage.
- Sectors: Type sector names (e.g., "Manufacturing", "Retail"). If a sector exists, it will appear as a suggestion. Press Enter to add a new sector if it doesn't exist. Click the (x) on a tag to remove it.
- Reports To: If the contact reports to someone else *within the same selected organisation*, you can start typing that person's name after selecting the organisation.
- Other fields like Job Title, Email, Phone, Address, Social Media URLs, and Coverage Area are optional but helpful.
- Click the "Add Contact" button at the bottom.
You will be redirected to the newly created contact's view page upon successful creation.
Viewing Contact Details
Clicking the "View" button () on the contacts list or clicking a contact's name elsewhere takes you to their detailed view page.
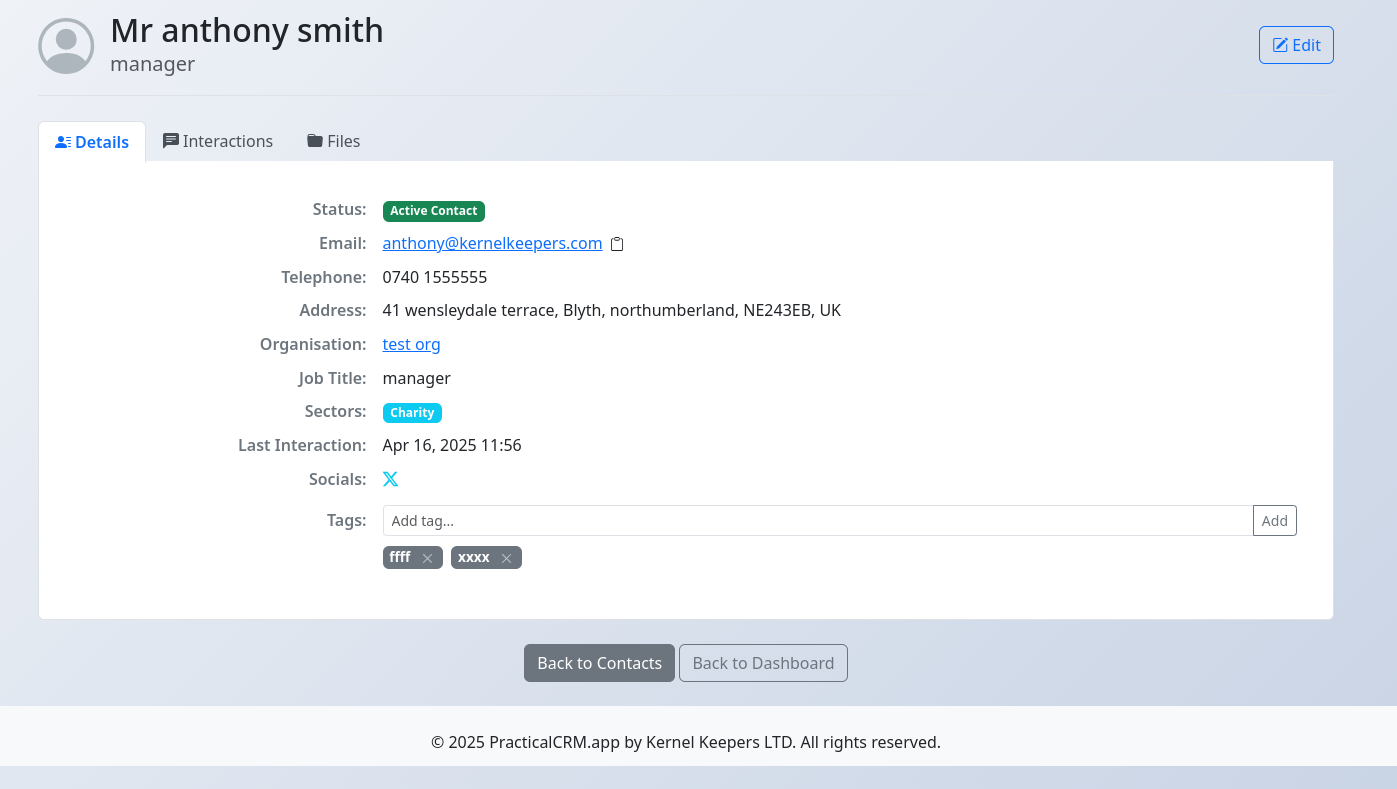
This page uses tabs:
- Details Tab: Shows all saved information for the contact, including their status, sectors, organisation, address, social links, and who they report to. You can also manage Tags here.
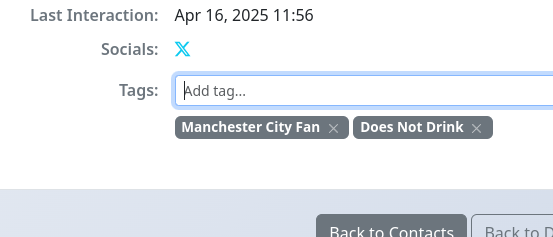
- Adding Tags: Type a tag name and click "Add" or press Enter.
- Removing Tags: Click the (x) next to an existing tag.
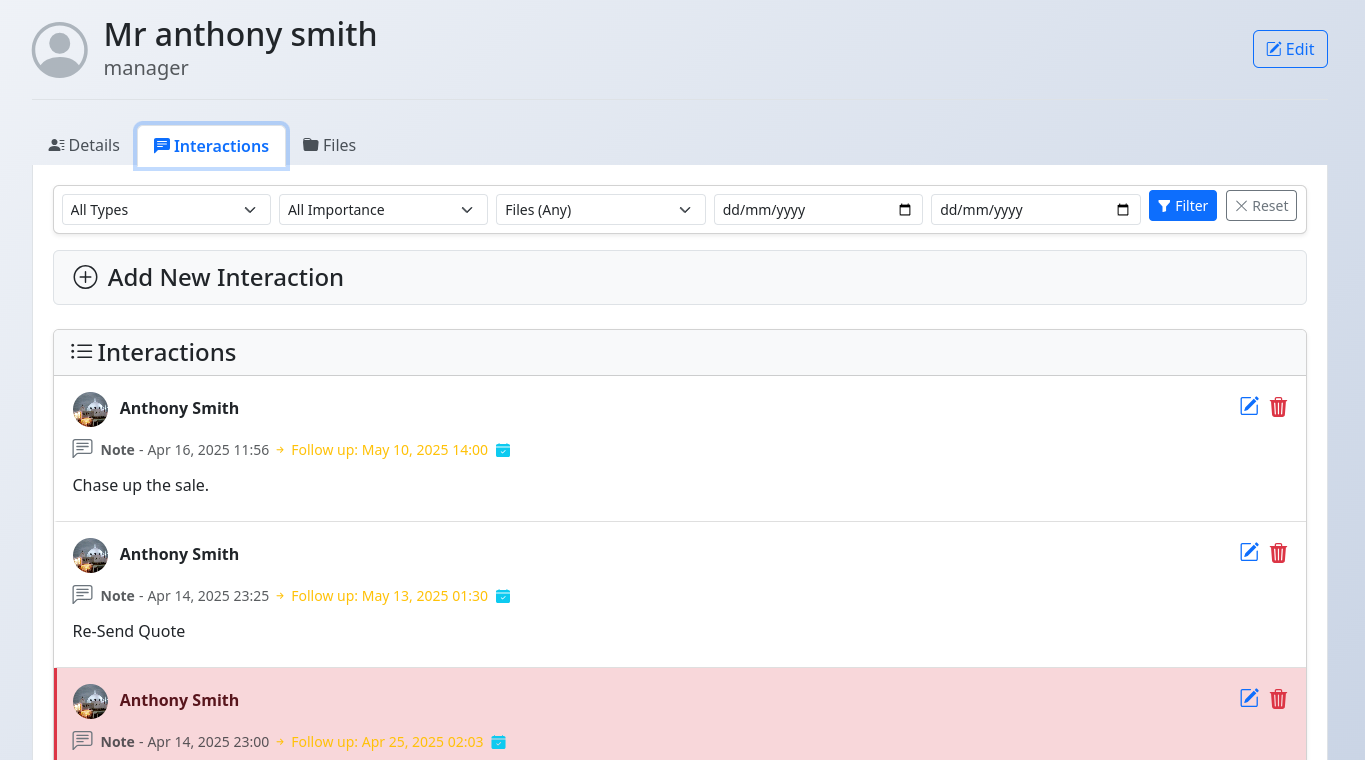
- Interactions Tab: Displays a history of all logged interactions (Notes, Calls, Emails, etc.) with this contact. You can filter this list and add new interactions here. (See Interactions Documentation)
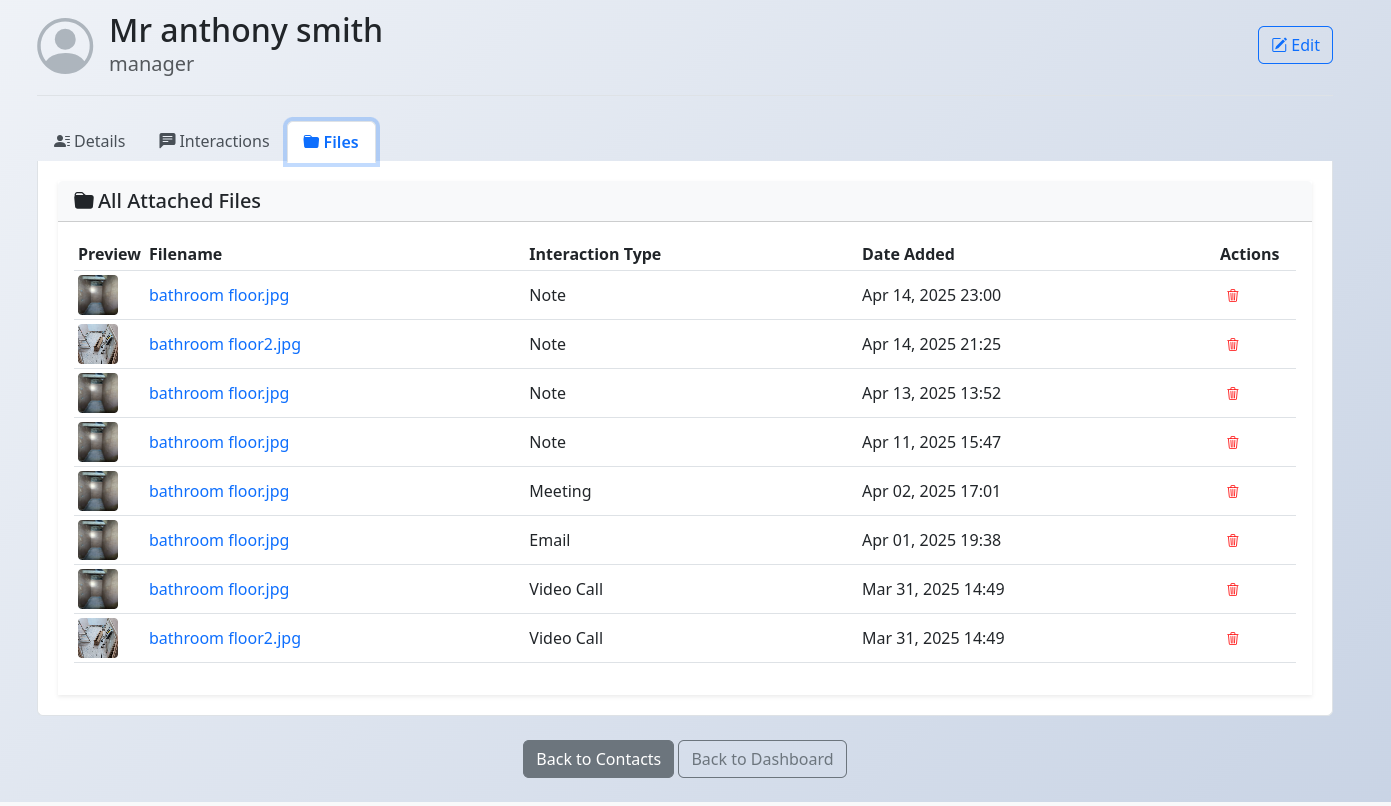
- Files Tab: Shows a table of all files that have been attached to any interaction logged for this contact, along with links to view/download them and delete options.
Click the "Edit" button () in the header to modify the contact's details.
Editing a Contact
Click the "Edit" button () on the contact's view page to access the edit form.
The form is the same as the "Add Contact" form but pre-filled with the contact's current information. Make your changes and click "Update Contact".
Merging Duplicate Contacts
If you find duplicate entries for the same person, you can merge them:
- Go to the main Contacts list page.
- Check the boxes next to the **two** contacts you want to merge.
- The "Merge Contacts" () button in the action bar at the bottom will become active. Click it.
- A modal window will appear, showing the data from both contacts side-by-side.
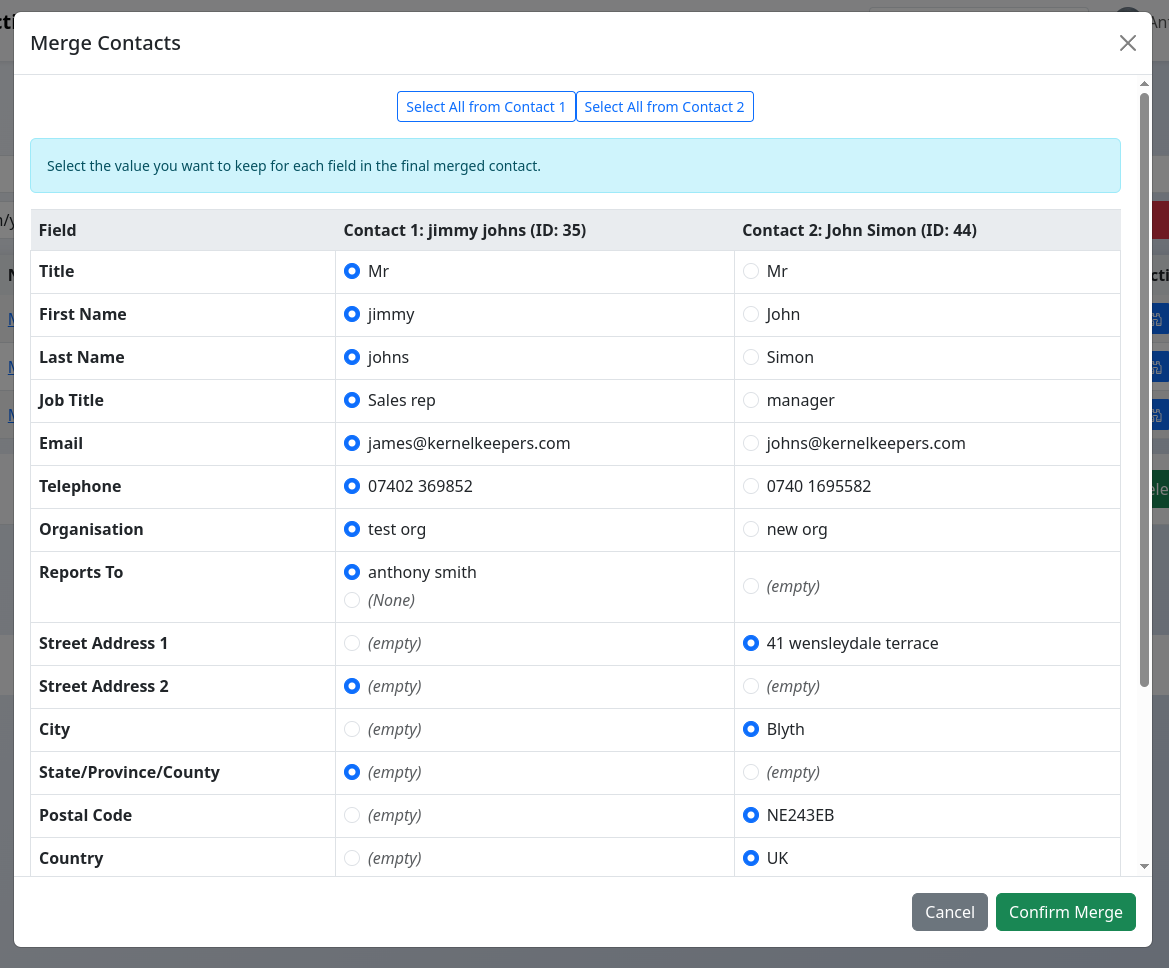
- For each field, select the radio button corresponding to the value you want to keep in the final merged contact. You can select values from either Contact 1 or Contact 2. Use the "Select All from..." buttons for convenience.
- Review your selections carefully.
- Click "Confirm Merge". You will be asked to confirm one last time as this action deletes the original two contacts.
The system will create a brand new contact record with the selected merged data. All interactions and other relevant links from the original two contacts will be reassigned to the new, merged contact.
Bulk Actions
From the main Contacts list, you can perform actions on multiple contacts at once using the checkboxes and the action bar at the bottom:
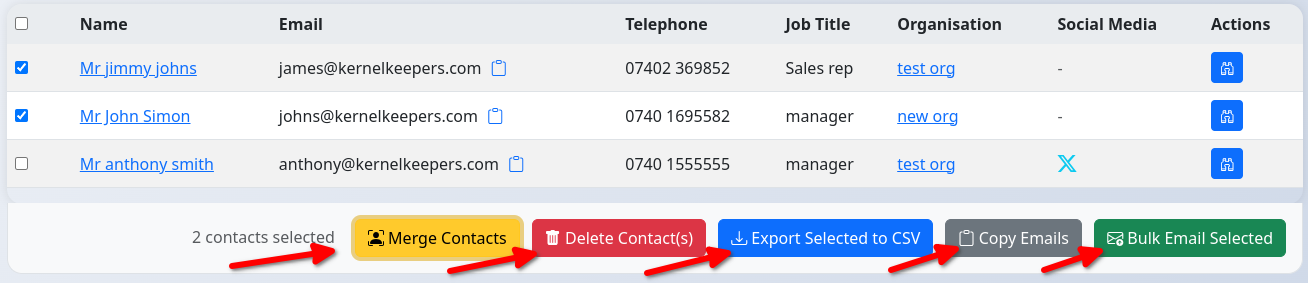
- Select All/Deselect All: Use the checkbox in the table header.
- Merge Contacts: Enabled when exactly two contacts are selected (see previous section).
- Delete Contact(s): (Admin only) Enabled when one or more contacts are selected. Click to permanently delete the selected contacts.
- Export Selected to CSV: Enabled when one or more contacts are selected. Generates and downloads a CSV file containing the details of the selected contacts.
- Copy Emails: Enabled when one or more contacts are selected. Copies the email addresses of the selected contacts (if they have one) to your clipboard, separated by semicolons, ready to paste into an email client.
- Bulk Email Selected: Enabled when one or more contacts are selected. Takes you to the Email Campaign creation page, pre-populating the recipients with your selection. (See Email Campaigns Documentation)