Interaction Logging
Keep a clear history of your communications and activities with contacts.
Adding a New Interaction
You can log interactions directly from a contact's view page:
- Navigate to the desired contact's page (`View Contact`).
- Go to the "Interactions" tab.
- Click the "+ Add New Interaction" bar to expand the form.
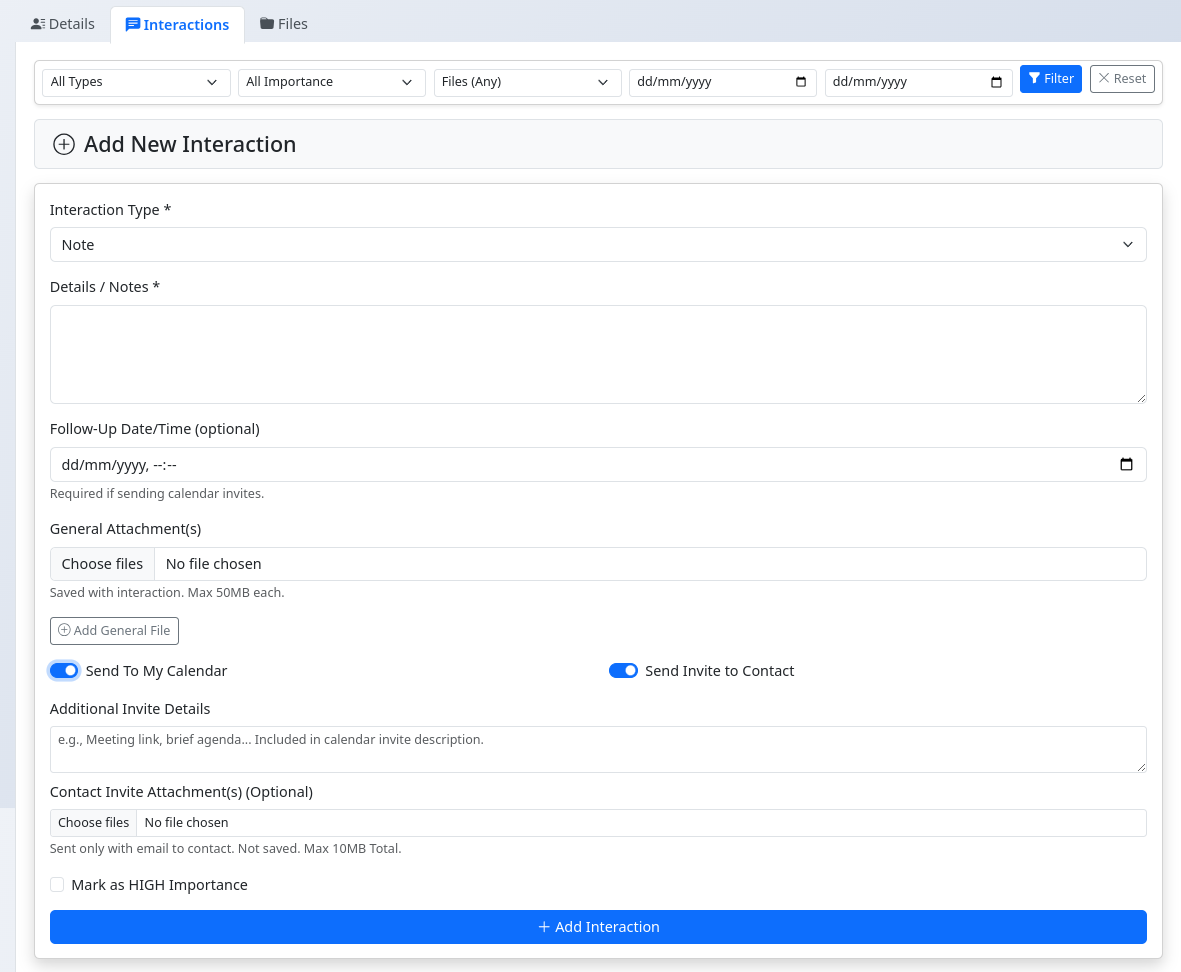
- Select the Interaction Type (Note, Call, Meeting, Email, etc.).
- Enter the Details / Notes of the interaction (this is required).
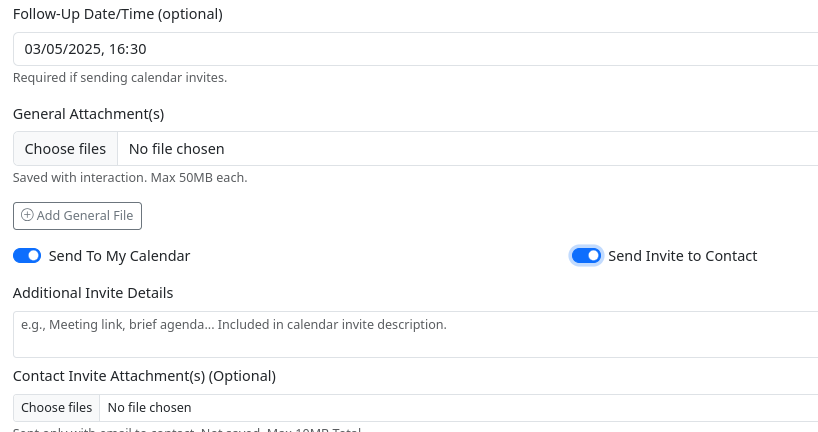
- Optionally, set a Follow-Up Date/Time if action is needed later.
- Optionally, attach General Attachment(s) relevant to this interaction (e.g., meeting minutes, call recording link file). Click "Add General File" to add multiple file inputs. Max 50MB per file.
- Optionally, check Send To My Calendar to receive an .ics calendar invite for the follow-up time to your login email. Requires Follow-Up Date and configured Email Settings.
- Optionally, check Send Invite to Contact to send an .ics invite to the contact's primary email. Requires Follow-Up Date and configured Email Settings.
- If checked, you can add Additional Invite Details (like meeting links or agenda points) which appear in the calendar description.
- You can also attach Contact Invite Attachment(s) which are sent *only* with the email invite to the contact (not saved permanently with the interaction). Max 10MB total for these.
- Optionally, check Mark as HIGH Importance to visually highlight this interaction in lists.
- Click "Add Interaction".
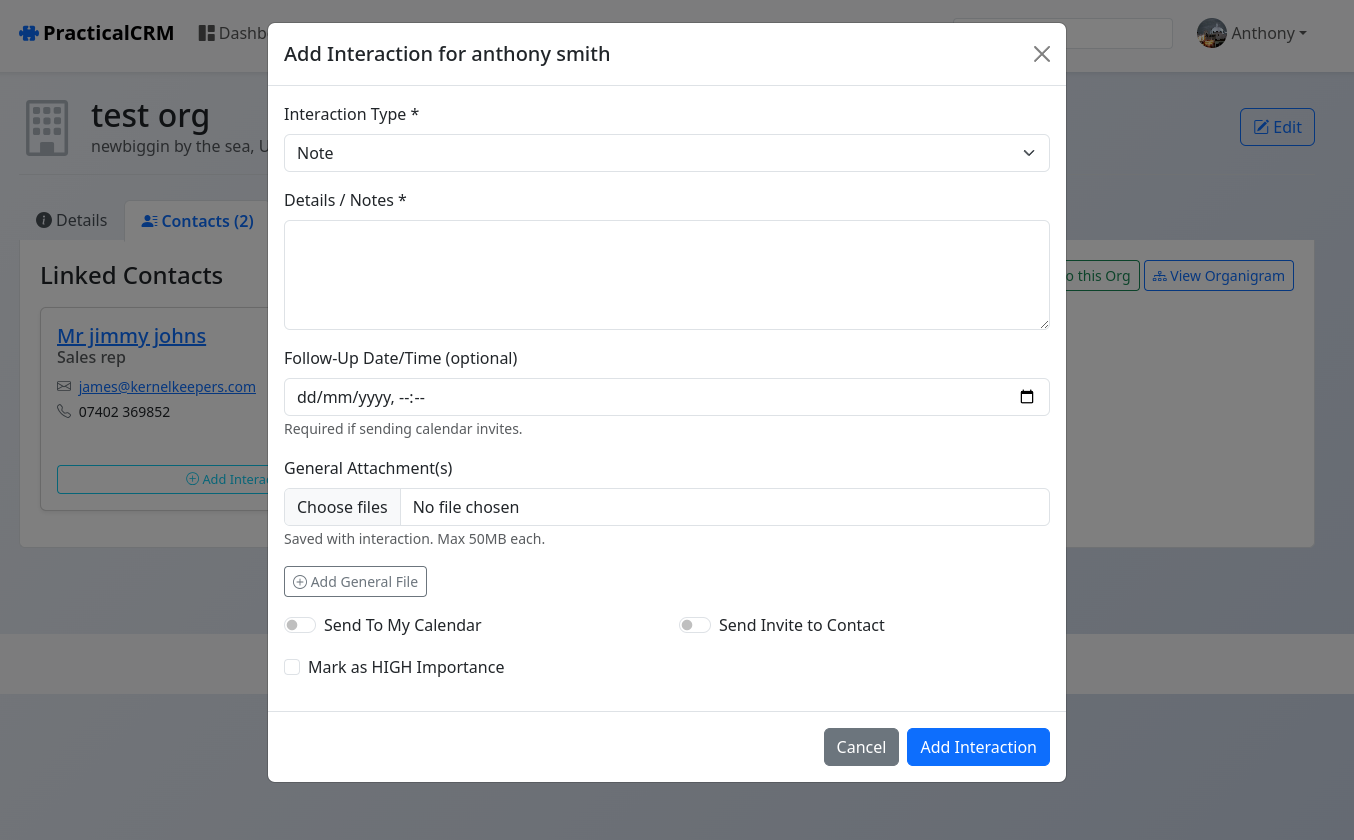
You can also add interactions for contacts linked to an organisation directly from the Organisation View > Contacts Tab by clicking the "+ Add Interaction" button on a contact's card. This opens a similar modal form.
Viewing Interaction History
The "Interactions" tab on a contact's page lists all logged interactions chronologically (newest first).
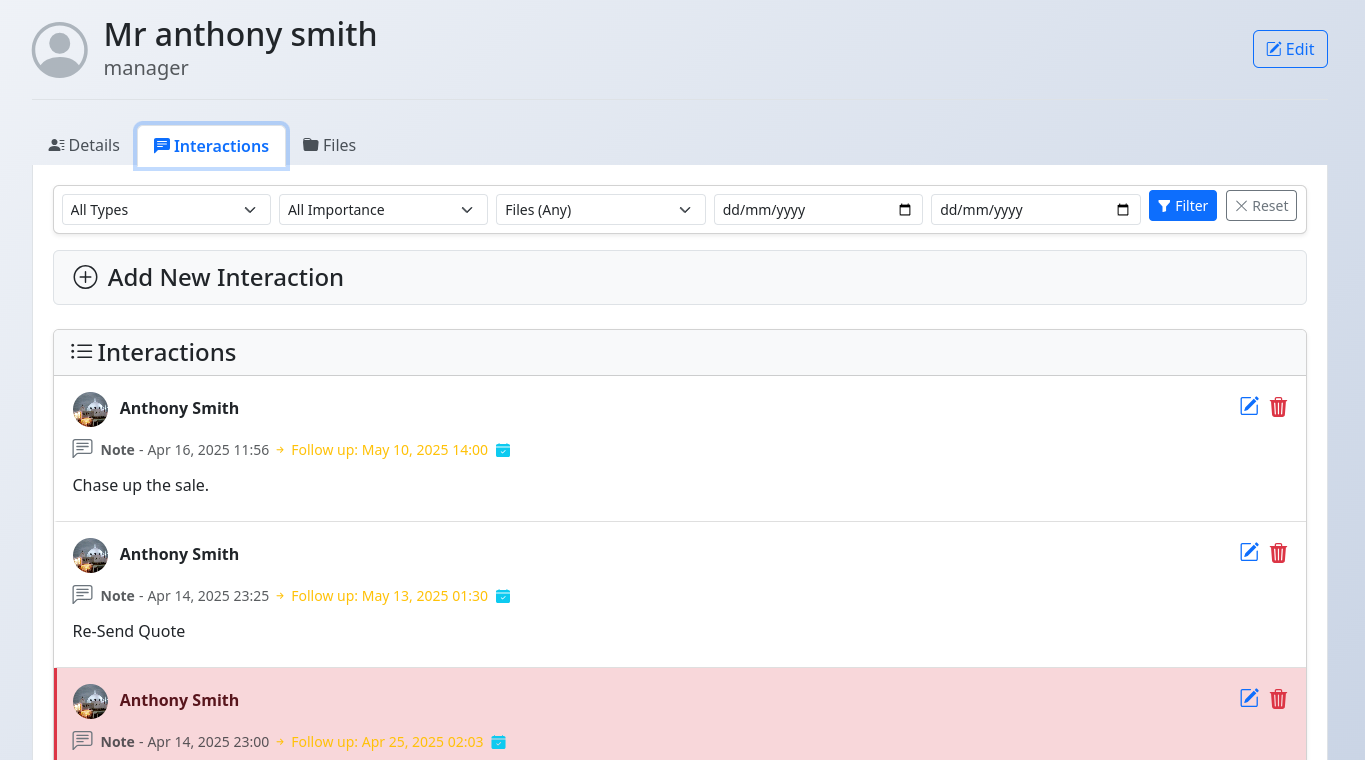
- Filtering: Use the filter bar at the top to show interactions by Type, Importance, whether they have Files, or within a Date Range.
- Details: Each entry shows the interaction type icon, date, user who logged it, details, and any follow-up date.
- High Importance: Interactions marked as high importance have a distinct visual style (e.g., red border).
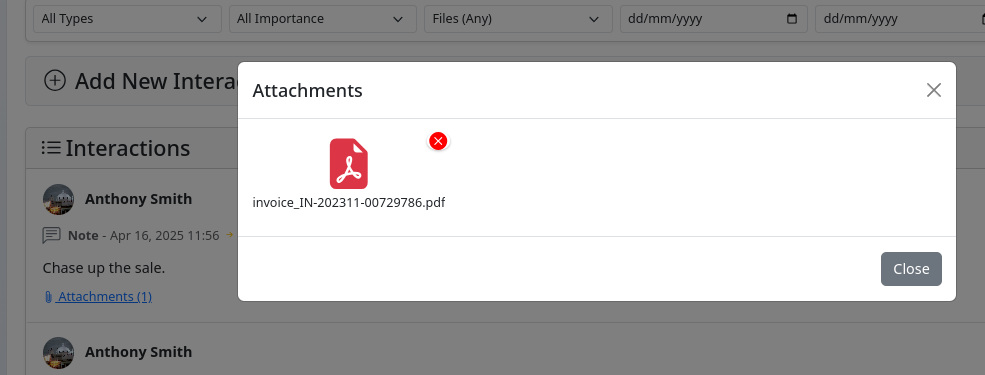
- Attachments: If an interaction has attachments, an "Attachments (count)" link appears. Clicking this opens a modal displaying the attached files.
- Calendar Icon: A icon indicates that a calendar invite was sent (either to the user or the contact).
- Actions: Use the "Edit" () and "Delete" () icons to manage individual interactions.
The "Interactions" tab on an *organisation's* page shows a combined feed of interactions for *all* contacts linked to that organisation.
Editing an Interaction
Click the "Edit" icon () next to an interaction in the list.
This takes you to the Edit Interaction page where you can modify the Type, Details, Follow-Up Date, Importance, and Calendar/Invite options. You can also add new attachments.
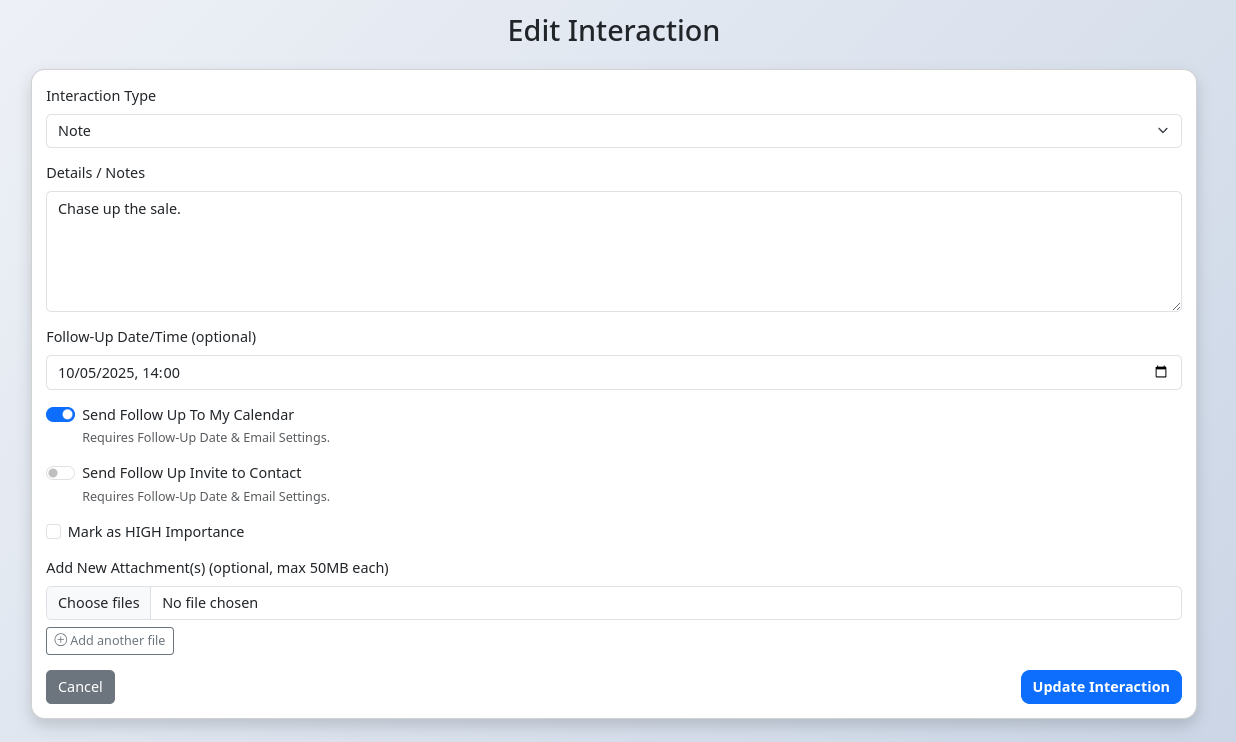
Click "Update Interaction" to save changes, or "Cancel" to return to the contact view.
Deleting an Interaction
Click the "Delete" icon () next to an interaction in the list. You will be asked to confirm.
Warning: Deleting an interaction also permanently deletes any files attached directly to it.
Managing Attachments
Attachments are managed within the context of the interaction they belong to.
- Adding: Attach files when creating or editing an interaction using the "General Attachment(s)" file input.
- Viewing: Click the "Attachments (count)" link on an interaction entry or view all aggregated files on the contact's/organisation's "Files" tab.
- Deleting:
- From the "Attachments" modal (opened via the interaction list): Hover over a file preview and click the red (x) icon.
- From the "Edit Interaction" page: Click the () icon next to the file listed under "Existing Attachments".
- From the contact/organisation "Files" tab: Click the () icon in the actions column for the desired file.
Deleting an attachment is permanent.