Expense Tracking
Manage expense claims for reimbursement, including itemization, evidence attachment, and an approval workflow.
Accessing the Expenses Module
Click "Expenses" () in your profile dropdown menu (top right) or navigate directly via the URL (usually `/expenses.php`).

The page is divided into tabs:
- My Expenses: Shows claims you have created, along with summary stats and a chart of your spending over different periods.
- Awaiting My Approval: (Visible to Approvers/Admins) Lists claims submitted by others that require your action.
- Actioned Claims: (Visible to Approvers/Admins) Shows a history of claims you have already approved or rejected.
- Reporting: (Visible to Approvers/Admins) Allows filtering and exporting of approved claims.
Creating/Editing an Expense Claim
- Click the "Create New Claim" button on the main Expenses page, or click the "Edit" icon () on an existing claim that is in 'Draft' or 'Rejected' status.
- You'll be taken to the claim form.
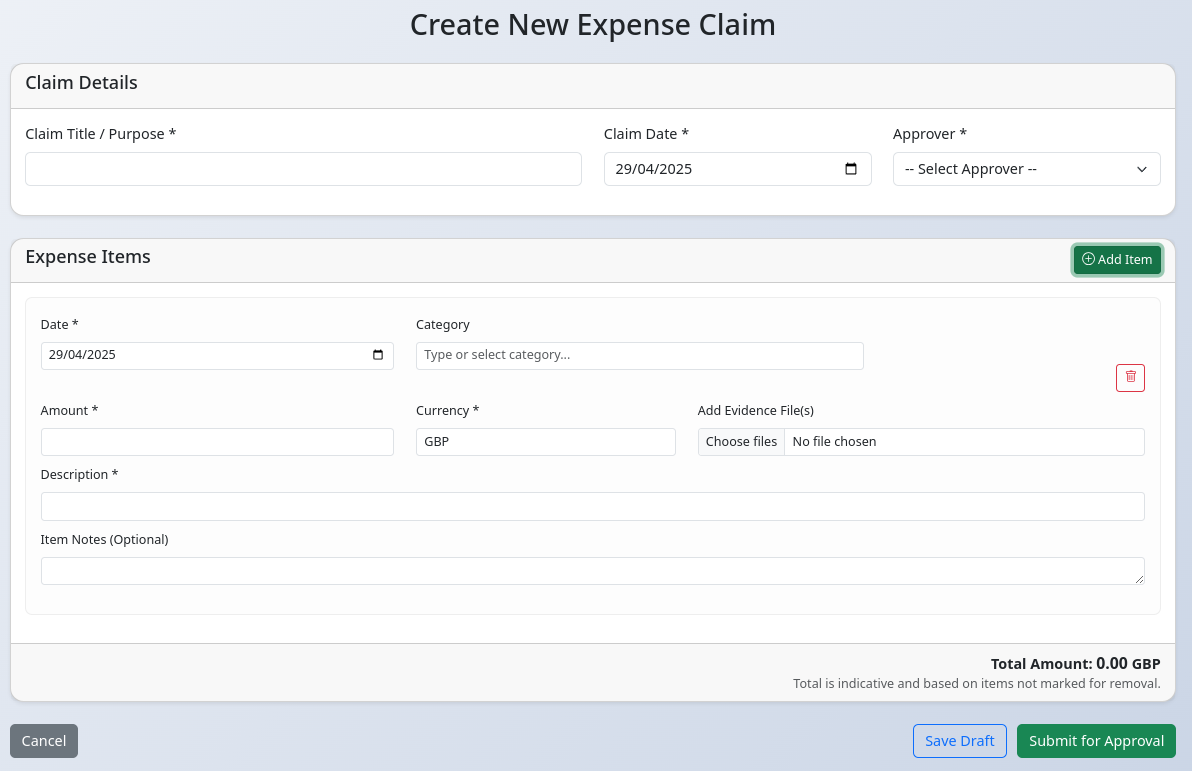
- Claim Details:
- Enter a Claim Title / Purpose (required).
- Set the Claim Date (required, typically the date of the last expense on the claim).
- Select the Approver from the dropdown list (required if submitting).
- Expense Items:
- Click "+ Add Item" to add the first expense item row.
- For each item:
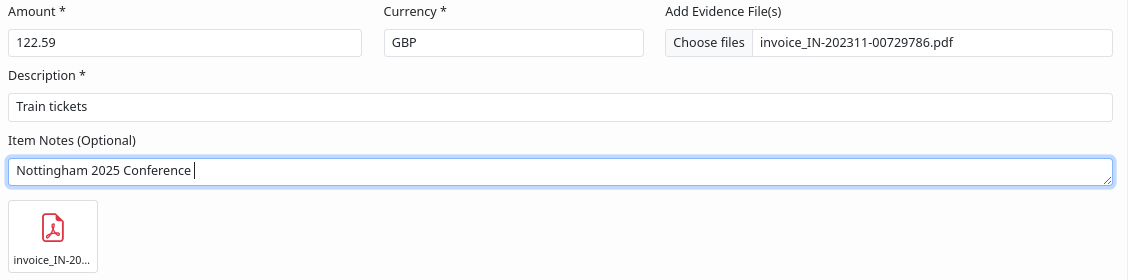
- Set the Date the expense occurred (required).
- Select or type an expense Category. New categories can be created by typing them in.
- Enter the Amount (required, must be positive).
- Verify or change the 3-letter Currency code (defaults to GBP).
- Provide a Description of the expense (required).
- Optionally, add internal Notes for the item.
- Optionally, Add Evidence File(s) (receipts, invoices). Click the file input to select files. Multiple files can be attached per item. Previews appear below.
- Click "+ Add Item" again to add more expenses to the same claim.
- Click the trash icon () next to an item to mark it for removal (it will be greyed out). Click "Undo" to reverse this.
- Saving/Submitting:
- Click Save Draft to save the claim without submitting it for approval. You can edit it later.
- Click Submit for Approval to save the claim and send it to the selected approver. You cannot edit it after submission unless it is rejected.
Viewing Your Expense Stats
The "My Expenses" tab includes a summary section showing your claim activity over different time periods.
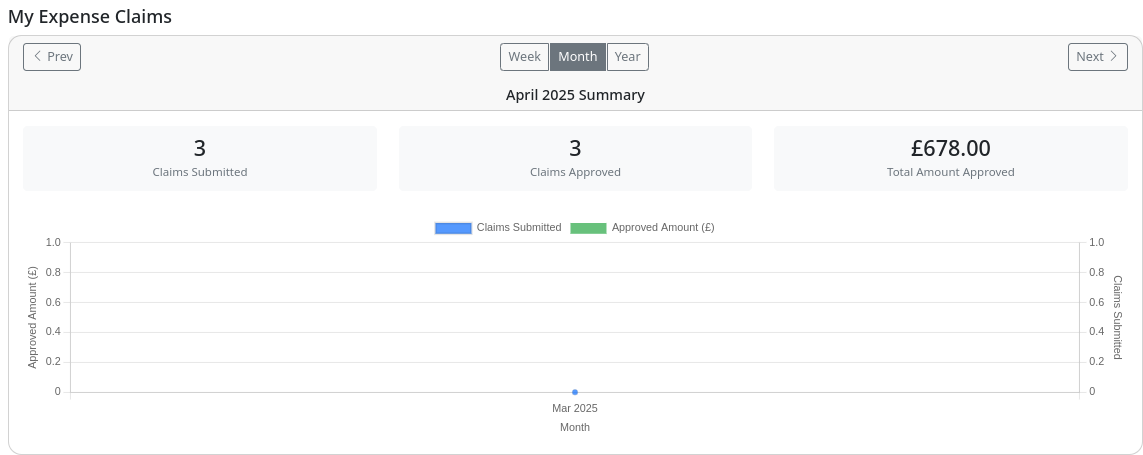
- Use the Week/Month/Year buttons and the Prev/Next arrows to change the reporting period.
- The cards show the total number of claims submitted, approved, and the total amount approved within the selected period.
- The chart visualizes the approved amount and number of claims submitted over the selected period.
Approving/Rejecting Claims
(Applies to users designated as Approvers or Administrators)
- Navigate to the "Awaiting My Approval" tab on the main Expenses page.
- This lists all claims submitted to you that need action.
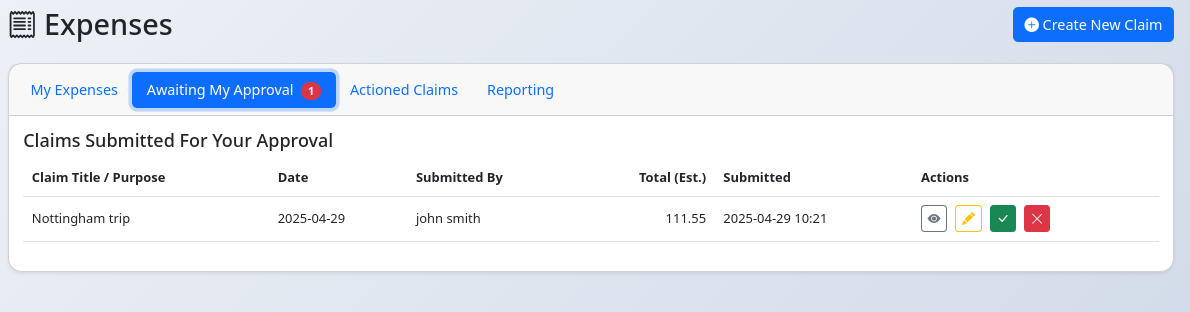
- For each claim:
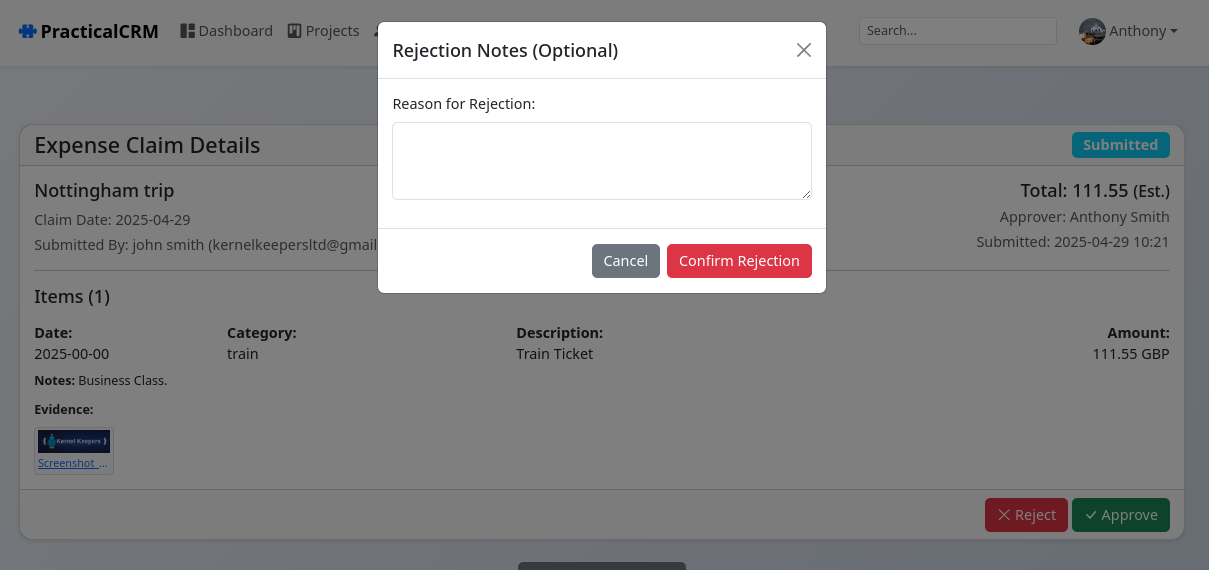
- Click "View Details" () to see the full claim, including items and evidence, before taking action.
- Click "Edit Claim" () to modify claim details or items *before* approving/rejecting (e.g., correcting a category or amount).
- Click "Approve" () to approve the claim as submitted (or edited).
- Click "Reject" () to reject the claim. A modal will pop up allowing you to enter optional rejection notes.
- Once actioned, the claim moves from this list. You can find it later in the "Actioned Claims" tab.
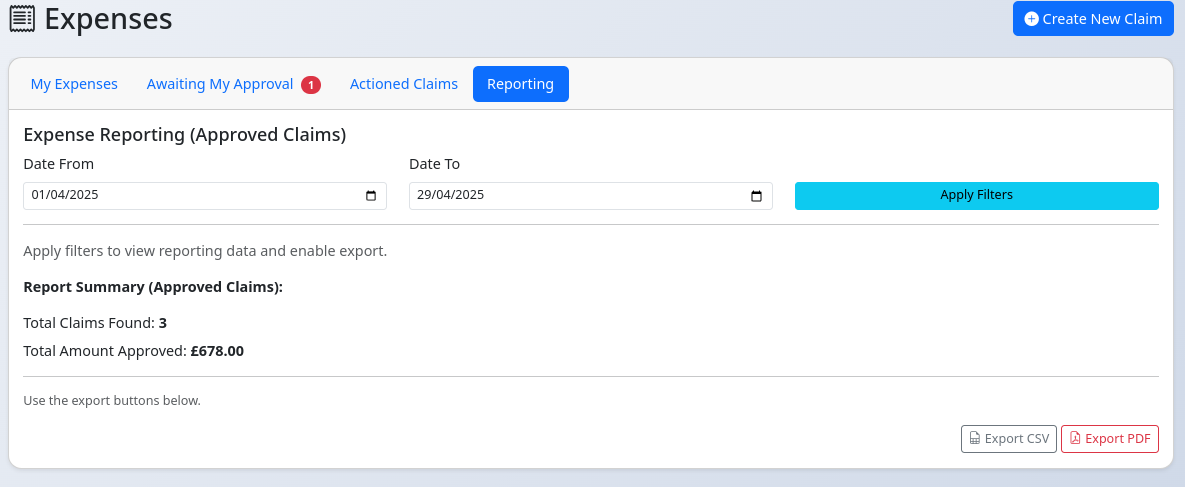
Reporting & Exporting
(Applies to users designated as Approvers or Administrators)
- Navigate to the "Reporting" tab.
- Use the date filters ("Date From", "Date To") to select the period based on when claims were *approved*.
- Click "Apply Filters".
- The summary totals (count and amount) for approved claims within the selected criteria will be displayed.
- Once data is loaded, "Export CSV" and "Export PDF" buttons become active. Click the desired button to download a report of the filtered approved claims.